Friday 28 February 2014

Cut fabric, lining, interface, elastic - Poltam skirt

Hi All,
This is part of the poltam skirt free pattern. To see all steps please  click poltam skirt free pattern.
Once you have calculated pattern pieces, the same calculator will provide the cutting options (1, 2 or 3 - Amber fields).We are now ready to cut.
1. Cut Fabric
2. Cut Lining
3. Cut Elastic
4. Cut Interface.

UPDATE: Video tutorial for this is available here -  pleated poltam skirt video tutorial - No lining

1. Cut Fabric: Before you begin, if you need to know what is grain or selvage click here.
I did read a lot how to place the waistband and I figured out that the waistband is placed with length of waistband parallel to that of selvage. Option 1 and 2 show that but in case you are really short of fabric you can use Option 3. Since this is elasticised the stability may not be such a big problem I guess. But I have found that there are other school of thoughts saying place it on cross grain to avoid shrinkage. If you follow any method please let me know.

2. Cut Lining:
a. Front Lining:
b. Back Lining
 3. Cut Elastic
 4. Cut Interface
I have used a regular scissor for elastic and interface.

You are now ready to start to sew.

Thanks,
Preethi.


If you enjoyed reading this you can either like my facebook page to get all updates and more or you can opt to receive posts via email. Don't forget to activate your subscription though!

Thursday 27 February 2014

Free Pattern - Pleated Poltam skirt with lining

Hi All, Below is pattern for a poltam skirt. Not really a pattern but more of maths and construction steps.

UPDATE: Video tutorial for this is available here -  pleated poltam skirt video tutorial - No lining

DIY any size Free Pleated skirt with lining free tutorial and pattern


Features:

Any size, any length
Pleated front
Gathered and elasticised back for a no bulk look.
Fully lined with front lining not gathered or pleated to avoid bulk.

Step 1: Supplies All supplies required are listed in poltam skirt supplies
Step 2: Calculate pattern pieces 
Video - Calculate pattern pieces
Clever online calculator to calculate the poltam skirt pieces. Just enter the waist and length required. All maths done!
The calculations is in cm. You can read my thoughts on cm or inches here
Step 3: Fabric shopping and thread shopping The fabric required is also available in the online calculator.  Just enter the fabric width in yellow. The bright green "fabric to buy in cm" shows the amount of fabric to buy.
Step 4:Wash and iron your fabric Don't forget this step as fabric shrinks a lot.
Step 5: Prepare to sew:

4.a: Wind the bobbin
4.b: Thread the machine and practice to sew straight line. Only straight line is all we will be sewing.
Step 6: Cut fabric, lining, elastic and interface
Video -  Cut fabric pieces
The amber fields in online calculator give the cutting options based on the fabric width you have bought. Here is how to cut fabric, lining, elastic and interface
Step 7: Sew
Video - Sew poltam skirt
7.a Make 3 tubes
7.b Gather and pleat
7.c Insert elastic and hem
Step 8: Iron Iron your skirt.
The tutorial is for dummies really(I'm myself one) - complete beginners with almost no knowledge on sewing. It starts from showing you how I thread the machine to have a beautiful skirt. I've only started to sew so I'm no expert but I can give you a complete beginner insight into my learning, my struggles and emphasize on points that were not obvious to me. This is how I made the skirt, if you find any mistakes or anything that shouldn't be done the way I have recorded here please let me know. I'll so be happy to hear from you, be criticized and correct myself. Just let me know. Thanks.

Some images from flickr are below:
Hope you find it helpful.
Thanks,
Preethi

If you enjoyed reading this you can either like my facebook page to get all updates and more or you can opt to receive posts via email. Don't forget to activate your subscription though!

Insert elastic and hem - poltam skirt with lining

Hi All,


UPDATE: Video tutorial for this is available here -  pleated poltam skirt video tutorial - No lining

After you have gathered and pleated your skirt, its now the final step. - Attach elastic and hem the skirt. So let's dive in.

How to fold waistband
1. Now fold under the waistband on the back of the skirt.
 2. Pin just on top of the stitching line
 3. Make sure the waistband width is 0.4 cm to 0.5 cm more than the elastic width.Adjust if needed
 4. Now sew just covering the stitching line (only the back not the front).
Skirt waistband with lining tutorial
5. You can see here that my new stitching line is a bit on the skirt part and bit of the waistband part. It will not be seen so fine. It may come perfectly for you on the waistband if your cutting and sewing is accurate.
6. Now sew the top of waistband at the back only just catching the waistband. This looks neat and keeps the waistband in place. I've had many failed attempts and learnt this. I also fixed twisted elastic from my leaning from making flat front back elastic skirt. But we will go a step further as well. :)
 7. You can see here that the front of the skirt waistband is still open.
8. Set you machine to zig zag stitch and finish both ends of the elastic and attach a safety pin.
inserting elastic in waistband
9. Insert at one end of the skirt.
10. Insert till there is only 1cm left at the end it was inserted.
11. Pin it to secure and continue till the elastic comes off the other end and then pin at 1 cm. Remove the safety pin. :). Now is the time to try the skirt for fit. 
1. If its loose take in a little more of elastic.
2. If its tight then leave only 0.5 cm of elastic to be sewed.
3. If its too tight something is wrong. You'd need to take another elastic longer than the current one and insert again.

12. Now sew back and forth at the seam line where you have pinned the elastic. I sew about 4 times to secure the elastic.
13. Now we will sew in the middle of the waistband. Pull the waistband (right hand pulls in front and left behind if you are right handed) and sew in the middle.

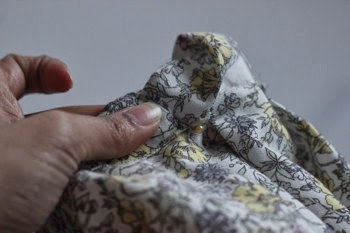
14. Finished back. :)
15. Fold under 1 cm for lining (wrong sides together) and again another 1 cm and press.
16. Sew. Repeat the same for the fabric as well with first fold of 1 cm and 2nd fold hem allowance (2cm in my case).

That's it. You are done.
Let me know if something isn't clear.
Thanks,
Preethi.
If you enjoyed reading this you can either like my facebook page to get all updates and more or you can opt to receive posts via email. Don't forget to activate your subscription though!

Gather and pleat - poltam skirt with lining

Hi All,
Skirt stitching iron interface in waistband pleated skirt

UPDATE: Video tutorial for this is available here -  pleated poltam skirt video tutorial - No lining

After having formed tubes for poltam skirt we are now ready to pleat the front and gather and attach elastic to the back. Are you ready?
Here we go.
Make sure you now have:
a.  Elastic that is cut to required measurements as per online calculator
b.  3 tubes (waistband tube, skirt lining tube and skirt tube)


 1. Set your machine to highest stitch length to run a basting stitch.
 2. I'm here using only 1 row of gathering as in 1st method as described in How to gather. Why?
a. Lazy :)
b. I'm hardly gathering fabric here. The back waistband and the skirt are a little different in lengths not a lot. That's because we will also be using elastic. But after I finished stitching the skirt I realised it would have produced a more neat effect had I used the proper way to gather (if not 2 rows on top and 1 down at least 1 on either side of seam allowance would do. )
Ok. So leave long of thread before you start to stitch without back stitching. Stitch midway of seam allowance on the top skirt back if using only 1 row of stitching else follow the how to gather techique steps.
3. Also leave long tails after sewing without back stitching.
4. Now we are going to nest the fabric pieces in the order shown. If you are confused what is front or top of the skirt pieces please refer poltam fabric pieces.
 5. First wear or nest the skirt lining to the skirt. Make sure the basted end is with the wider end of the top of the lining.
 6. Pin the seams together at both ends. Important: Wrong sides are facing you. (right side of the lining with wrong side of the fabric)
 7. Now nest the waistband to be the outer most. Remove the previous pins and now pin all 3 together at the seams
How to stitch skirt with lining
8. This is how it looks.

9. Now pin together the center and quarter points of the lining and skirt (only at the back that is where it is gathered) that you marked at the last step of forming tubes
10. Now using pull push method as described in gathering technique make the gathering fabric equal length as the lining.
11. Pin all 3 fabrics together at various points to keep the gathers. Again only at the back. Even out the gathering with a skewer if needed.
12. If you find that the lining piece is a little longer in width than the waistband then you could give it a small pleat like shown here. 
 13. Now turn the skirt inside out. Now we will start to pin the front of the skirt. Pin the center of the skirt (front) to the lining and the waistband.
 14. Form 3 pleats (pleats facing the side seams). I haven't calculated it but approximately 1.5 cm to 2 cm is the width of each pleat. Just pinch the fabric to form a pleat.
pleasted skirt tutorial
 15. 3 pleats from center left face the left side seam and 3 pleats from center right face the right side seam.
 16. This is how to back looks after the skirt top part is fully pinned and ready to be stitched.
 17. Now stitch all along at the seam allowance. (2 cm in my case)
 18. I now cut the fabric above the stitching line to 0.5 cm.

19. The skirt looks like this now. Starting to look like a skirt now :). Not far now.

Hope you are with me until this? Let me know.Thanks.

-Preethi.


If you enjoyed reading this you can either like my facebook page to get all updates and more or you can opt to receive posts via email. Don't forget to activate your subscription though!

Tuesday 25 February 2014

Make 3 tubes - poltam skirt with lining

How to sew pleated skirt

UPDATE: Video tutorial for this is available here -  pleated poltam skirt video tutorial - No lining

Hi All, Lets now start to sew the poltam skirt. Its very much like the phus phus skirt tubes  except that this has lining and the lining has no gathers in front and slightly elasticised back for a no bulk look.  We will be making 3 tubes and marking the center and quarter points.

Make sure you have 6 fabric pieces before you start (2 lining, 2 skirt, 1 front waistband and 1 back waistband)

 1. Pin shiny side of the interface to the wrong side of front waistband to leave seam allowance distance all around.
 How to apply interfacing to waistband
2. Iron interface on. I do not move the iron as it misplaces the interface, just keep it on the interface and lift to move it.
Check if interfacing is stuck properly
3. Make sure the interface is ironed well by trying to list the corners.

4. This step is optional only if you are using slippery fabric like viscose, rayon, silk. I'm using rayon here. Spray starch on the edges of all fabric pieces (4)  and iron. The edges must now stiffen. 4 here and not 6 since the lining I have used is cotton and doesn't need starch.
5. Fold the front waistband in half lengthwise with wrong sides together and press. Repeat same from back waistband.

6. Pin right sides together on the edges of the waistband at the shorter side (there is no top or bottom yet).
Pin right sides together for skirt
 7. Pin right sides together for the skirt pieces at the side seams.
 8. Pin right sides together for the lining pieces right sides together.

9. Note that the trapezium lining piece will the longer than the rectangle as you are attaching the the diagonal end to the straight end. I just trim it when I'm hemming the skirt.
 
10. Before we can start sewing there is one important step:
a. If front skirt lining is longer than front waistband - No problem - we can give a small tuck inside no one can notice it or you can take in more of the side seams for the front skirt lining when sewing.
b. both are equal - best
c. Front skirt lining is less than front waistband - problem - the side seams will not align when sewing. The way I do it is to take in less than the seam allowance for the lining to make it equal.

11. Set the machine to straight stitch normal stitch length and sew along the pinned fabrics ( all 3 tubes)
12. Trim the seam allowance. I trimmed from 2 cm to 1 cm.
 
13. Set the machine to zig zag stitch or use a serger if you have one to finish off the seams.
14. Finish the seams. I like to both separately.
15. Finished seams.


 16. Press on top of the stitched line for all 3 tubes.
 17. Wear the tubes onto the ironing board and press open the seams.
Press seams flat

18. A close up of the seams. The tubes are now ready to be attached.
 19. This is skirt lining. The top shorter width is the top of the skirt.

 10. The front waistband is the shorter width.
21. There is front or back or top or bottom of the skirt. You can choose one of the open sides as top.

22. Mark center and quarter points
a. Skirt : Mark center and quarter points front and back.It doesn't have to be exact. I just fold fabric in half and then in quarter and mark the points.
b. Lining: the shorter side of trapezium is the top side. Mark center and quarter points on front and back.
c. Waistband: Choose one open side as the top. Mark center and quarter points front and back.
We are now ready to attach the pieces together.

Thanks,
Preethi.


If you enjoyed reading this you can either like my facebook page to get all updates and more or you can opt to receive posts via email. Don't forget to activate your subscription though!

Related Posts Plugin for WordPress, Blogger...